
In my previous post, I wrote about the context, that I wanted to create a Continous Delivery Pipeline between the source code and the hosting infrastructore (Amazon AWS). To ensure software quality, all commits should pass the test suite. Especially if you develop test-driven, this way of creating such a Continous Integration Pipeline is recommended.
OK, enouth with all the theory. Let`s be a little bit more concrete. Let`s imagine that we have a Node.JS project, which is a Feathers.JS project. Another languages, like a PHP project, would be of course also possible. For this post, I use an old study project. It is a simply API to provide an attendance checker functionality: https://github.com/tum-ase-33/rest-server
That means, to start the test-suite, we need to execute the following snipped on our console:
npm test
Please notice: if you use the example rest-server, a mongodb server must run.
To run our test-suite in Gitlab-CI, we have to create a docker container also in Gitlab. This process is similar to the creation of a docker-compose file. The only difference is that we have to create a .gitlab-ci.yml file instead of a docker-compose.yml file. In this file, we also model the whole required system environment. But first of all, we create model all possible stages. Possible stages can be testing, build and release:
stages:
  - testing
  - build      # part of second part of the tutorial
  - release    # part of third part of the tutorial
It is important that a stage and a git branch are not the same. Stages are used in gitlab to provide a certain execution order in the CI process. In this example, all testing processes must be met, then all build processes and after that all release processes. Of course, you can specify in the end, that some processes should be only processed for special branches (e.g. build and release processes only in the master branch).
To run the test process of the application, we create a new suite like this:
stages:
  - testing
  - build      # part of second part of the tutorial
  - release    # part of third part of the tutorial

testsuite_image:
  stage: testing
  image: node:6.9.1
  script:
   - npm install
   - DATABASE_URL=mongodb://mongo:27017/app npm test
  services:
   - mongo:3.2
Thereby, we run our npm test command in a Node.JS version 6.9.1 environment. Additionally, we inject a MongoDB service in the container because it is required by the testsuite code. If you commit this peace of code now in the root of your project folder, the testsuite is executed each time if new code is committed and pushed to the git server. So, we will be always notified if the test-suite does not pass and exit with an error that we can correct the causes for this.
For more information about the customization of the .gitlab-ci.yml file, see https://docs.gitlab.com/ce/ci/yaml/.
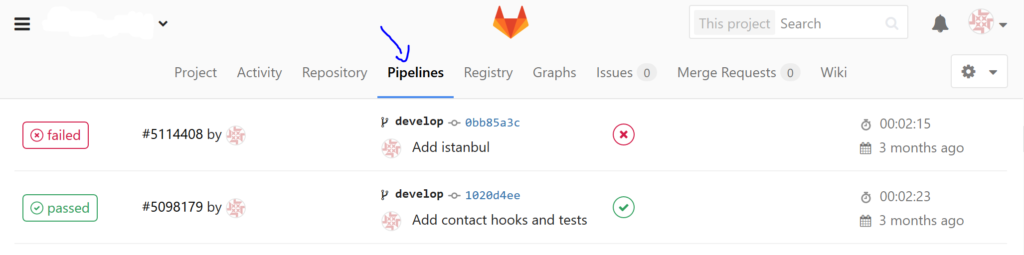
In the end, your pipelines can look like that:
In the next part, we will discover, how we can create and store a docker image of our source code in Gitlab.
Sources:
- https://about.gitlab.com/2016/08/26/ci-deployment-and-environments/
- https://docs.gitlab.com/ce/ci/yaml/
The number of tests will grow over time, and the times reported will depend on the computer running the tests.
Thats true. Even though it is important that the tests run at least before each rollout. Nevertheless, I think it is very important that the test runs after each commit. Normally, the tests I mention are only Unittests and they can be executed very fast. Gitlab can help you in a good way to achieve this goal. Of course, if the number of tests/test duration increases, then you need also more machine power for your gitlab server but this is worth doing it because it increases your quality a lot 🙂