
In my previous two posts, I described how to use the Gitlab CI as well as how to build/push your docker image with Gitlab CI. In the next step, we want to integrate our newly generated docker image on AWS. In this step, we use AWS Elastic Container Service (ECR).
Now, we want to use these images in AWS. The normal step would be that we login to our Gitlab registry with:
docker login registry.gitlab.com
In the previous posts, we used the build token of gitlab for the authentication but this key expires after some time. Therefore, we can not use them to pull images (because maybe after some time, the pull request won’t work anymore). So you can simply use your normal user gitlab credentials. I would really recommend to create an additional user because otherwise the user could have to much permissions, which is a security leak.
To pass the login credentials to your EC2 instances, you have to modify your Container EC2 Instances (instructions see here: http://docs.aws.amazon.com/AmazonECS/latest/developerguide/private-auth.html). After that, you are able to pull from your private gitlab docker repository.
In the end, your AWS Task Definition could look in the end like this:
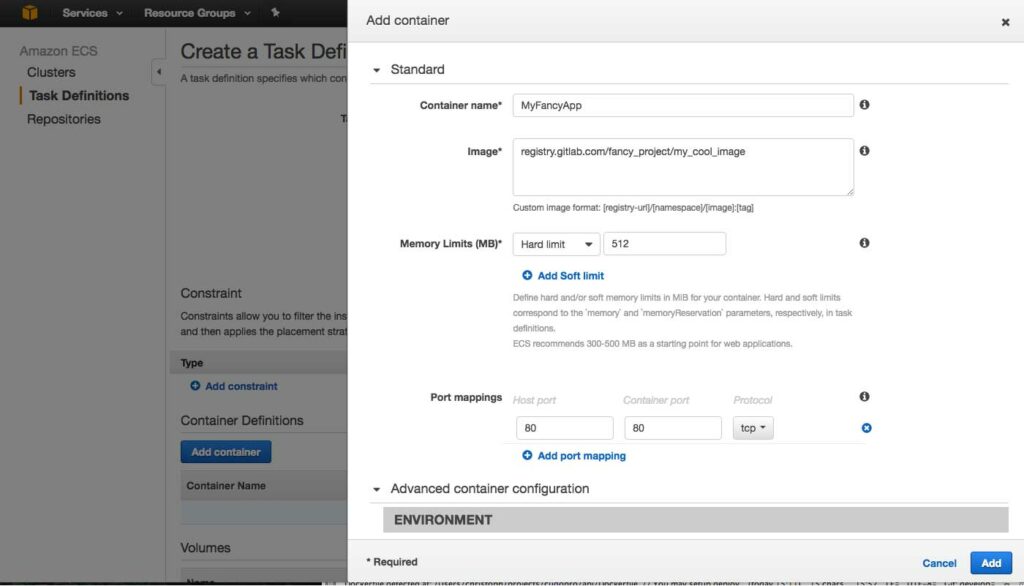
In the end, you will see that the manual steps to add your docker registry credentials to the AWS EC2 instance is quite hard and uncomfortable. Therefore, it is quite easier to use the AWS Elastic Container Registry (ECR) to store your repositories. The advantage is that you do not need to pass any docker credentials because pull requests are always accepted within the AWS network. The usage is also quite easy:
Backup: Push docker images from Gitlab CI to AWS ECR for using it in AWS ECS
Step 1: Deploy your docker image from Gitlab CI to AWS ECR
In this step, I will explain you how to push images to AWS ECR. The steps are quite easy. First of all, create a IAM service account with programmatic access. In this step you should assign the AmazonEC2ContainerRegistryFullAccess policy to the account. Then store the access key and the access secret key as environment variables (Settings > CI/CD Pipelines > Secret variables):

Now, create a script login-ecr.sh the folder ./scripts:
#!/usr/bin/env bash

echo "Start logging in ECS"
mkdir ~/.aws;

curl "https://bootstrap.pypa.io/get-pip.py" -o "get-pip.py";
python get-pip.py;
pip install awscli --ignore-installed six;

echo "[default]\naws_access_key_id=$BUILD_ACCESS_KEY\naws_secret_access_key=$BUILD_SECRET_KEY" > ~/.aws/credentials;
echo "[default]\nregion=$AWS_ECR_REGION" > ~/.aws/config;
login_string=`/usr/local/bin/aws ecr get-login --region eu-central-1`;

eval $login_string;
This code stores the AWS credentials in the docker container to use them later on for the deployment with the python AWS cli. Next, you have to include the script in your gitlab-ci.yaml. In the end, this could look like this:
build_image:
  stage: build
  only: [master,tags]
  image: gitlab/dind:latest
  services:
    - docker:dind
  script:
    # build image
    - docker build -t my_fancy_project .
   # login to docker ECR
    - sh ./scripts/login-ecr.sh
   # tag docker image and push it to ECR
   # TODO: Update the amazon registry link with your own
    - docker tag  /:latest
    - docker push /:latest
Please note, that you have to replace the amazonaws.com url with your own AWS ECR registry url. If you do not have still created a AWS ECR repository, then please do this. In a repository, all your docker image versions are stored. A tutorial how to create such a repository can be found here: http://docs.aws.amazon.com/AmazonECR/latest/userguide/repository-create.html
After that, the repository URL can be inserted in the updated gitlab-ci.yaml file.
If you run now the pipeline, your image will be pushed to AWS ECR and can be used in the ECS instances.
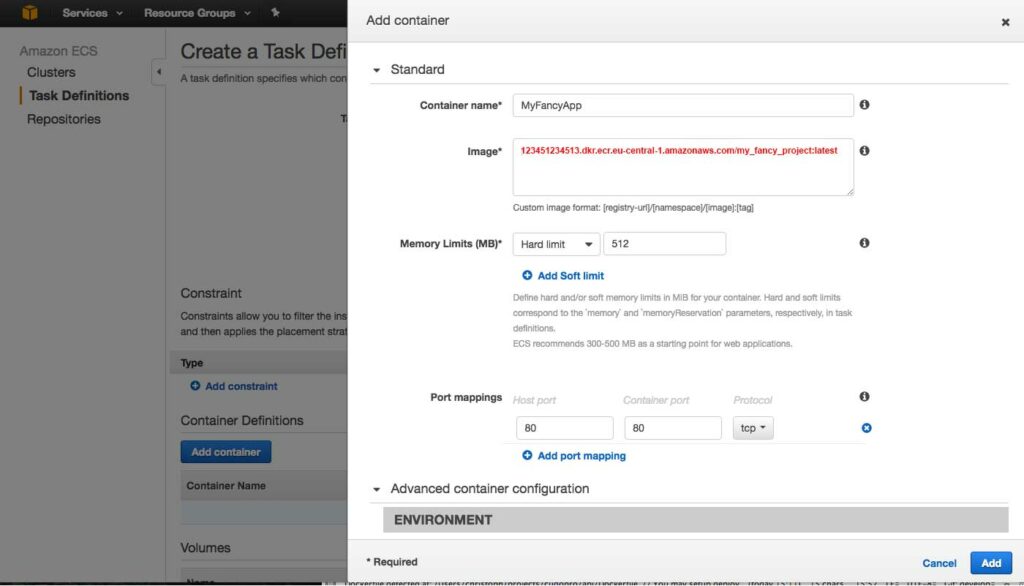
Using docker images from ECR in ECS
The last and easiest step is now to use the on AWS ECR stored images. This can be done similar to the previous step. Just replace the gitlab repository url with the AWS ECR one, like this:
That’s all. Hope you enjoyed my tutorials and if something is unclear, feel free to post a comment or send me a message.
how was your Container EC2 Instances?
How did you manage to pass gitlab registry docker login credentials to EC2? I have been trying with elastic beanstalk but I can seem to get it to work. gitlab registry logs say “error authorizing context: authorization token required”. Here are excepts of the files I am using. I have looked at all the docks online but I am at a loss why I can’t get it work. Would appreciate your insight on this. Thanks.
Dockerrunaws.json <>
.docker/config.json <>
file excerpts
Dockerrunaws.json
“authentication”: {
“bucket”: “bucket-name”,
“key”: “.docker/config.json”
},
.docker/config.json
{
“auths”: {
“https://registry.pgitlab.com/v2/”:{
“username”: “user”,
“auth”: “personal-access-token”
}
}
}
Why don’t you simply push your docker image to ECR instead of pushing it to gitlab? Is there a reason for this?
But if you need to store your images on Gitlab, then first check if your S3 bucket is in the same zone like your EC2/EBS instance. Then maybe also a rebuild of your EBS environment would help. When I worked with the custom config files, then this fixed mostly my issues. If this all does not work, I can not say more about it without looking at your system, sorry.
Hope this helps.
Cheers,
Christoph
Very nice article
What about triggering ECS to actually do a rolling deployment ?
meaning start new containers with the new image and kill the previous.
Thank you
It is quite simple. You only need to update the existing task definition by using your own bash script. This article (https://spin.atomicobject.com/2017/06/06/ecs-deployment-script/) describes the steps quite well but finally, you just have to
1) get the previous task definition
2) Appending the your new revision to the JSON file
3) Register the task definition
4) Update the service.
This is the most intersting part in the article for your case:
[…]
(
cd “${DIR}/..”
REVISION=$(git rev-parse “${BRANCH}”)
PREVIOUS_TASK_DEF=$(aws ecs describe-task-definition –region “${ECS_REGION}” –task-definition “${ECS_TASK_DEFINITION_NAME}-${ENVIRONMENT}”)
NEW_CONTAINER_DEF=$(echo “${PREVIOUS_TASK_DEF}” | python <(cat <<-EOF import sys, json definition = json.load(sys.stdin)['taskDefinition']['containerDefinitions'] definition[0]['environment'].extend([ { 'name' : 'REVISION', 'value' : '${REVISION}' }, { 'name' : 'RELEASE_VERSION', 'value' : '${VERSION}' }, { 'name' : 'ENVIRONMENT', 'value' : '${ENVIRONMENT}' }]) definition[0]['image'] = '${ECR_URI}/${ECR_NAME}:${ENVIRONMENT}-${VERSION}' print json.dumps(definition) EOF )) aws ecs register-task-definition --region "${ECS_REGION}" --family "${ECS_TASK_DEFINITION_NAME}-${ENVIRONMENT}" --container-definitions "${NEW_CONTAINER_DEF}" aws ecs update-service --region "${ECS_REGION}" --cluster "${ECS_CLUSTER_NAME}" --service "${ECS_SERVICE_NAME}-${ENVIRONMENT}" --task-definition "${ECS_TASK_DEFINITION_NAME}-${ENVIRONMENT}" ) [...]